Creating and applying bulleted lists
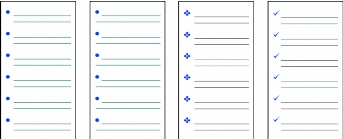
When creating a bulleted list, you can choose a preset bullet format.

These are examples of preset bullet formats.
You can also apply a bullet format to existing text.
You can replace a bullet with a custom symbol, such as a heart, star, or check mark. You can also create a list that uses check boxes.

These are characters that can be used as QuickBullets.
To create a bulleted list |
|
1.
|
|
Click in a document.
|
|
2.
|
|
Click Insert
|
|
3.
|
|
Click the Bullets tab.
|
|
4.
|
|
Choose a bullet style from the Bullets list.
|
|
5.
|
|
Click OK.
|
|
6.
|
|
Type text, and press Enter.
|
|
Perform this step for each entry in the list.
|
![]()
|
•
|
|
You can also create a bulleted list by opening the Bullets
|
|
•
|
|
You can discontinue a bulleted list by pressing Backspace.
|
To create a bulleted list from existing text |
|
1.
|
|
Select the text to which you want to apply the bullet format.
|
|
2.
|
|
Click Insert
|
|
3.
|
|
Click the Bullets tab.
|
|
4.
|
|
Choose a bullet style from the Bullets list.
|
![]()
|
•
|
|
You can also add a bullet to existing text by clicking at the beginning of a line, opening the Bullets
|
|
•
|
|
You can type body text between list items by pressing Enter twice, and pressing the Up arrow to type on the line that begins without a bullet.
|
To enable QuickBullets |
|
1.
|
|
Click Tools
|
|
2.
|
|
Click the Format As-You-Go tab.
|
|
3.
|
|
In the Format As-You-Go choices area, enable the QuickBullets check box.
|
![]()
|
•
|
|
QuickBullets are disabled by default.
|
To create a bulleted list by using QuickBullets |
|
1.
|
|
Click in a document.
|
|
2.
|
|
Type a QuickBullet character.
|
|
3.
|
|
Press Tab.
|
|
4.
|
|
Type the text, and press Enter.
|
|
Perform this step for each entry in the list.
|
![]()
|
•
|
|
To use QuickBullets, they must first be enabled. For information about enabling QuickBullets, see “To enable QuickBullets.”
|
|
•
|
|
If you do not want one of the characters in the QuickBullets list to begin a bulleted list, add it to the QuickCorrect list. For information about QuickCorrect, see “Correcting misspelled words automatically.”
|
![]()
|
•
|
|
You can discontinue a bulleted list by pressing Backspace.
|
To create a custom bullet |
|
1.
|
|
Click in a document.
|
|
2.
|
|
Click Insert
|
|
3.
|
|
Click the Bullets tab.
|
|
4.
|
|
Click More bullets.
|
|
5.
|
|
In the Symbols dialog box, choose a set of symbols from the Set list box.
|
|
6.
|
|
Choose a symbol from the Symbols list.
|
|
7.
|
|
Click Insert and close.
|
To insert check boxes before list items |
|
1.
|
|
Click View
|
|
2.
|
|
In the Available toolbars area, enable the Shipping macros check box.
|
|
3.
|
|
Click OK.
|
|
4.
|
|
Click at the beginning of a new line.
|
|
5.
|
|
Click the Check box
|
|
6.
|
|
Press Tab.
|
|
7.
|
|
Type text, and press Enter.
|