Modifying font settings
You can apply formatting to text to change the font and its attributes, such as style, size, and color.
You can also apply relative font sizes, which allows you to format text relative to the specified font size. Suppose you want to add a heading to a document that has a 12-point paragraph font. If you select the heading text and specify a large relative font size, the text displays proportionately larger than the 12-point font.

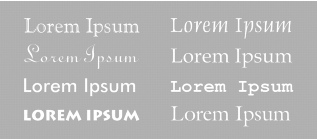
This is an example of different fonts.
Using Corel RealTime Preview lets you view text fonts and sizes before you apply them. For example, you can view text as it will display in various fonts before choosing which is the most suitable. If you do not want to preview fonts and their sizes, you can disable Corel RealTime Preview.
WordPerfect lets you format text using recent font settings, including the font and its size. You can also change the default font and font size for the active document or for all documents.

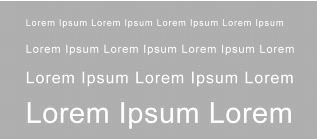
This is an example of different font sizes.
To change the font |
|
1.
|
|
Click in the document.
|
|
2.
|
|
Click Format
|
|
3.
|
|
Click the Font tab.
|
|
4.
|
|
Choose a font from the Face list.
|
![]()
|
•
|
|
You can also change the font color by clicking the Font color
|
|
•
|
|
You can also change the underline font style by opening the Underline
|
To change the font appearance |
|
1.
|
|
Select the text you want to modify.
|
|
2.
|
|
Click Format
|
|
3.
|
|
Click the Font tab.
|
|
4.
|
|
In the Appearance area, enable one or more of the following check boxes:
|
|
•
|
Bold — Applies bold formatting to the selected text
|
|
•
|
Italic — Applies italic formatting to the selected text
|
|
•
|
Underline — Applies a single unde
rline to the selected text |
|
•
|
Outline — Outlines the selected text
|
|
•
|
Shadow — Applies a shadow to the selected text
|
|
•
|
Small caps — Applies small capitals to the selected text
|
|
•
|
Redline — Applies the color red to the selected text
|
|
•
|
Strikeout — Applies a line through the selected text
|
|
•
|
Hidden — Applies the hidden format to the selected text
|
To change the font by using Corel RealTime Preview |
|
1.
|
|
Click in a document.
|
|
2.
|
|
Open the Font face list box on the property bar, and point to a font.
|
|
Changes to the font display in the font face preview window.
|
|
3.
|
|
Choose a font from the Font face list box.
|
![]()
|
•
|
|
You can change the font size using Corel RealTime Preview by opening the Font size list box on the property bar, viewing the font sizes in the font size preview window, and choosing a font size.
|
To disable Corel RealTime Preview |
|
1.
|
|
Click Tools
|
|
2.
|
|
Click the Display icon.
|
|
3.
|
|
Click the Document tab.
|
|
4.
|
|
In the Show area, disable the RealTime Preview check box.
|
![]()
|
•
|
|
Corel RealTime Preview is enabled by default.
|
To apply a recently used font |
|
1.
|
|
Select the text you want to format.
|
|
If the Fonts toolbar is not displayed, click View
|
|
2.
|
|
Click the QuickFonts
|
![]()
|
•
|
|
The QuickFonts list displays the 10 most recently u
sed fonts. |
To change the default font and font size |
|
1.
|
|
Click File
|
|
2.
|
|
Choose a font from the Face list.
|
|
3.
|
|
Choose a font size from the Size list box.
|
|
If you want to change the default font and font size for all new documents, click Settings, and click Set as default for all documents.
|
![]()
|
•
|
|
You must install a printer before you can change the default font.
|
|
•
|
|
If you specify a default printer font and distribute the file to others, the file may not display or print correctly if their printer doesn’t have the specified default font.
|
![]()
|
•
|
|
You can view the available attributes for each font by clicking the plus sign (+) to the left of a font in the Face list.
|