Using merge commands
Merge commands (or merge codes) help you customize and automate a merge. Merge commands instruct WordPerfect how to combine data sources and form documents. Like macro commands, they resemble programming languages in the use of a language (syntax), variables, and logical operations.

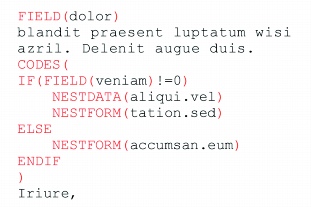
Merge codes are displayed in red and the text you type is displayed in black.
You can customize a merge by inserting merge commands. For example, if you add the DATE command to a letter, WordPerfect will replace the [DATE] code with the current date. You can also delete, display, or hide merge commands.
WordPerfect performs a specific function for each merge command. Some codes are accessible as buttons on the Merge toolbar. Other merge commands require careful placement and the correct use of parameters and other commands.
The POSTNET command can be inserted into a form document. A POSTNET bar code is a postal symbol used for addresses in the United States. WordPerfect inserts the POSTNET bar code for the specified ZIP code. You can insert the same POSTNET bar code for all of the records in a merge, or you can insert a different code for each record in a data file.
To insert a merge command |
|
1.
|
|
On the Merge toolbar, click Insert merge code, and click More.
|
|
2.
|
|
Click where you want to insert a merge code.
|
|
3.
|
|
Choose a merge code from the Merge codes list box.
|
|
4.
|
|
Click Insert.
|
|
If prompted, type parameters, and click OK.
|
|
You can also
|
|
|---|---|
|
Delete a merge command
|
Click at the beginning or end of a merge command, and press Delete.
|
![]()
|
•
|
|
For more information, see “Reference: The Merge toolbar and programming commands.”
|
|
•
|
|
When you delete merge commands, WordPerfect will remove the code and parentheses, leaving prompts and parameters.
|
To display or hide a merge command |
|
1.
|
|
Click Tools
|
|
2.
|
|
Click Display.
|
|
3.
|
|
In the Display settings dialog box, click the Merge tab.
|
|
4.
|
|
Enable one of the following options:
|
|
•
|
Display merge codes — displays the merge commands
|
|
•
|
Display merge codes as markers — displays command markers only
|
|
•
|
Hide merge codes — does not display commands
|
![]()
|
•
|
|
You can also click Options on the Merge toolbar to display or hide merge codes.
|
To display or hide a merge command for a keyboard merge |
|
1.
|
|
Click Tools
|
|
2.
|
|
Click Options.
|
|
3.
|
|
Choose one of the following options from the Display merge codes list box:
|
|
•
|
Show codes — displays the merge commands
|
|
•
|
Hide codes — does not display commands
|
|
•
|
Show as markers — displays command markers only
|
To merge a single POSTNET bar command in a form document |
|
1.
|
|
On the Merge toolbar, click Insert merge code, and click More.
|
|
2.
|
|
Click where you want to insert the POSTNET bar command.
|
|
3.
|
|
Choose POSTNET(string) from the Merge codes list.
|
|
4.
|
|
Click Insert.
|
|
5.
|
|
Type the ZIP code between the parentheses of the POSTNET command.
|
|
6.
|
|
Click Close.
|
To insert a merge field for a POSTNET bar command |
|
1.
|
|
On the Merge toolbar, click Insert merge code, and click More.
|
|
2.
|
|
Click where you want to insert the POSTNET bar code.
|
|
3.
|
|
Choose POSTNET(string) from the Merge codes list.
|
|
4.
|
|
Click Insert.
|
|
5.
|
|
Click between the parentheses of the POSTNET command.
|
|
6.
|
|
On the Merge toolbar, click Insert field.
|
|
7.
|
|
In the Field names box, choose the field containing the ZIP code.
|
|
8.
|
|
Click Insert and close.
|
![]()
|
•
|
|
To choose a field, you must have associated a data source with the form document. If not, you can type the name of the field, making sure that it matches the field name in the data source. For information about data sources, see “Associating merge files.” For information about form documents, see “Working with form documents for a merge.”
|